Monday, April 29, 2013

No Waste Windmill

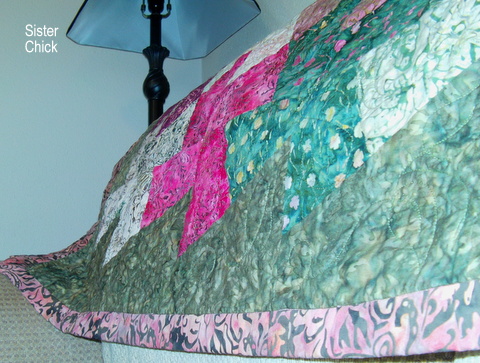
The first time I looked through a book of quilt patterns, I fell in love with "No Waste Windmill." Quilters might think I used the 'Twister Tool' to make this quilt, but instead I used the pattern from "Rotary Cutting Revolution." I love batik fabric and quickly started collecting batik pre-cuts when I caught the quilting bug. I had a Bali Cracker (10” squares), called Pomegranate.  The pattern called for 8 inch squares so I figured that using 10 inch squares would increase my quilt size, pretty good figuring

Hoffman Bali Cracker, Pomegranate
Like my first quilt, I wasn't sure I understood the instructions but was anxious to get going, so after reading them several times I began cutting. When I had everything cut I laid the cut blocks out in a windmill pattern putting darks next to lights. And wow! I loved it! It was the perfect size for my guest bed. But the joke was on me as I would later find out just how much a quilt can shrink when you have a ¼” seam on the side of each piece.
Since I don't have a layout wall I use the "Layout Guest Bed!"
  It ended up being perfect size for the back of our couch and The Engineer loves using it when he's up late reading.


A note about the 1" wide binding: I needed a border and fell in love with the pink & green I've used as binding but there wasn't enough so I bought my #2 pick for the green border. I wanted to show the pink & green off so I added the extra thick binding


No, you're not seeing double! The quilt below, ended up being shipped off to my ailing step mother, once an avid quilter herself, who says she loves having something beautiful on her bed. The Engineer was not about to part with his when I suggested sending her ours his, so my option was to make a look alike. I chose like fabrics instead of using the Pomegranate collection.

The long arm quilting is much cooler on the "look alike" quilt. I designed and made a pantograph with tropical leaves and Hibiscus flowers. 

Everyone Starts Somewhere...

When I saw "French Braid Quilts," by Jane H Miller & Arlene Netten, I was instantly hooked. I decided a while earlier that I was going to make a quilt for my Mom since she had never received a quilt but had them made for each of her grandchildren. I took the book to the fabric store and started picking out batiks. It took me several trips to different stores to find all the batik fabrics that would blend to make the braids.
Some of the 14 braid fabrics, before cutting.
Love the end one, it looks like clouds.

What was the most difficult part? First, selecting the fabrics. Then re-reading and understanding the instructions; this was my first quilt! Cutting took me several evenings as I laid out my piles for each braid in order. Then I started piecing my first braid, instant addiction! As the braid grew The Engineer liked it more and more, encouraging me in my new found hobby. I couldn't put it down, 2 hours later I finished the first braid.
Wow! I surprised myself.
I painstakingly planned this quilt with 5 braids instead of four and added two strips to each braid so the quilt would be long enough to have a nice hang on my Mom’s bed.
 Two Chicks, two Ladders and a cold windy day. 
Thanks Heather & Brianna for braving the ladders & wind to hold up a quilt.
The patchwork back, glad I over bought fabric this time. 


But that's not the whole story. The quilt has never made it to her bed, rather it 's on the back of her couch so she can show it off to all of her visitors. If I'd known she wasn't going to put it on  her bed I would have made a smaller quilt and and changed the colors to match her living room!